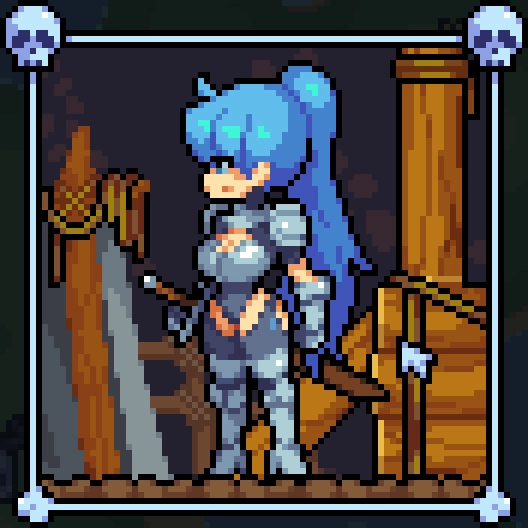
Kingdom Rush 6: Genesis throws some seriously intense boss fights your way, each packed with unique mechanics that can quickly unravel your defenses if you're not prepared. These encounters aren't just about raw power—they’re about adapting your strategy on the fly and keeping your cool when the unexpected hits. Mastering these bosses can turn a tough run into a satisfying victory, making every stage feel worthwhile.
Six colossal bosses loom across Kingdom Rush 6: Genesis' 18-stage campaign, each demanding a fresh approach. Unlike typical tower defense opponents, none play by the same rulebook. While some boast intimidating abilities, understanding their quirks helps you dismantle their threats without succumbing to frustration or wasted resources.
Here’s a quick snapshot of what you’ll face in these boss fights:
The bosses and their defining traits break down like this:
| Boss | Stage | Normal HP | Defining Mechanic |
|---|---|---|---|
| Gor’Thok | 8 (Fortress of Acaroth) | 7,200 | Unblockable war cart; switches to melee with war cry that buffs allies |
| J.T. | 10 (Abominable Lair) | 8,400 | Devours nearby units; freezes towers and drops damaging icicles |
| Sarelgaz | 11 (Frostbite Nest) | 9,000 | High magic resistance; leaps away twice, spawning tougher spiders each phase |
| Moglok-Hai | 13 (Stormcloud Halls) | 10,500 | Almost immune while shielded; only Sunray Tower disables shield briefly |
| Lord Blackburn | 15 (Castle Blackburn) | 11,000 | Heavy armor; ground slam stuns nearby towers |
| Vez’nan | 18 (Vez’nan’s Tower) | 6,666 → 6,999 on reveal | Fights as three copies; real one heals, locks towers, drains souls |
Keep in mind these stats are for Normal difficulty. Bosses beef up significantly on Veteran and Impossible modes with extra HP and defensive stats detailed below.
Gor’Thok - Stage 8, Fortress of Acaroth
Gor’Thok kicks off the Genesis boss gauntlet with a challenge that feels unfair at first—a hulking war cart charging forward that you simply cannot block. Once his health drops below 70%, he ditches the cart to fight footsoldier style, unleashing a potent war cry that doubles damage for nearby orcs and ogres.
His melee hits deal 120-160 damage in an area around him every 15 seconds with that buff, so the real danger isn’t just Gor’Thok but his pumped-up minions.
HP by difficulty: 5,600 (Casual), 7,200 (Normal), 8,000 (Veteran), 13,000 (Impossible). He has no armor or magic resist to worry about.
The key here is saving your rear blockers during the charge and focusing your fortress catapult on the orc horde ready to be buffed. Don’t waste too much damage on Gor’Thok initially—shutting down the buffed reinforcements is your priority to keep the fight controllable.
J.T. - Stage 10, Abominable Lair
J.T. ratchets up the tension by gobbling any units in melee range every second, making clustered units a liability. Every 20 seconds, he temporarily freezes up to four towers, locking you out of key defenses for 15 seconds. Luckily, tapping a frozen tower five times frees it early.
When frozen, J.T. stands still for a 3-second damage window, but watch out for icicle clusters that fall and damage units on both sides. Don’t crowd your defenses right under him.
HP by difficulty: 6,700 (Casual), 8,400 (Normal), 9,500 (Veteran), 11,000 (Impossible). No armor or magic resist.
Prepare stable lanes ahead of his arrival because shaky defenses won’t hold long. Reserve a powerful spell for the freeze window to maximize damage and take advantage of his vulnerability.
Sarelgaz - Stage 11, Frostbite Nest
Sarelgaz feels relentless with her speed boosted by webs on the battlefield, which simultaneously slowdown your troops by 25%. She devours units every 4 seconds and phases out at 75% and 45% HP, hiding her health bar while releasing waves of spiders that grow tougher each phase.
Her 76% magic resistance makes pure magic damage ineffective here, so diversify your damage sources.
HP by difficulty: 7,700 (Casual), 9,000 (Normal), 11,000 (Veteran), 12,000 (Impossible).
Early investment in anti-air towers is crucial since this fight gradually reveals the map. Don’t sacrifice lane control chasing Sarelgaz herself—the spider minions will punish that hard.
Moglok-Hai - Stage 13, Stormcloud Halls
Moglok-Hai presents a true puzzle: he sits behind a shield granting 98% armor and magic resistance, rendering your usual towers nearly useless. Only the stage-specific Sunray Tower can briefly disable this shield, stunning him for 5 seconds before he shifts to the opposite path and reactivates the shield.
His melee strikes pack 150-250 damage, and if the Sunray Tower takes three consecutive hits, you instantly lose. This fight requires you to keep your sorcerers alive and the Sunray charged, carefully timing when you can hit Moglok-Hai.
HP by difficulty: 9,000 (Casual), 10,500 (Normal), 13,000 (Veteran), 17,000 (Impossible).
Build sturdy defenses that don’t rely solely on the Sunray Tower, and time your burst damage for shield windows. Early losses of magical damage dealers can cost you the entire fight.
Lord Blackburn - Stage 15, Castle Blackburn
Lord Blackburn ditches subtlety, hitting hard with melee attacks dealing 175-225 true damage that ignore armor and resistances. Every 18 seconds, he performs a ground slam stunning up to four nearby towers, disrupting your defenses.
Narratively, you control him as an ally before a curse turns him hostile mid-stage. Unlike other bosses, no shields or tricky phases—just a straightforward brutal brawler with high HP and armor.
HP and defenses by difficulty: 9,000 (Casual), 11,000 (Normal), 12,000 (Veteran), 14,000 (Impossible) with 60% armor on Normal. Blackburn has no magic resistance at any level.
His lack of magic resistance means magic towers bypass his armor and punch through more damage. Always keep a blocker on his exit path during the boss phase—losing track of him is a quick way to lose stars.
Vez’nan - Stage 18, Vez’nan’s Tower
The final boss fight pits you against three Vez’nans simultaneously—two illusions and the real one. Illusions die first but trigger deadly bursts that wipe nearby units and spawn Demon Lords, while locking down towers every 15 seconds. Quickly tapping locked towers frees them early.
After both illusions fall, the real Vez’nan teleports center stage, clears other enemies, and heals to a higher HP pool. He unleashes true damage bolts and soul-siphons up to five units regularly, healing 100 HP per unit drained. Added pressure comes from Moloch's claw attacks and lava hazards, ensuring the fight is never a simple 1v1.
Starting HP by difficulty: 5,666 (Casual), 6,666 (Normal), 7,666 (Veteran), 8,666 (Impossible). Revealed phase HP: 5,999 (Casual), 6,999 (Normal), 7,999 (Veteran), 9,999 (Impossible).
Prepare with a mix of ranged, magic, and area-of-effect damage to handle illusions, Demon Lords, and the main boss effectively. Managing waves carefully is crucial since early summons multiply the healing through soul-siphon.
Which of these Kingdom Rush 6 Genesis bosses threw you the hardest curveball? The difficulty variety here ensures no two runs feel the same, so discussing strategies helps sharpen your approach.
FAQ
What happens if a boss reaches the exit?
Allowing any boss to reach the exit means you lose all your remaining lives instantly, no matter how many you had left—this rule is firm across all boss fights.
Do boss HP and defenses change by difficulty?
Absolutely. Bosses gain more health and defensive stats depending on the difficulty level, with some like Lord Blackburn seeing armor rise from 50% on Casual up to 74% on Impossible. Always double-check these values before planning your strategy.
Will more bosses get added later?
Developer Ironhide has confirmed two mini-campaign updates slated for 2026, each adding new stages, heroes, towers, and spells. However, no additional bosses have been announced yet; for now, the game features six distinct bosses.
Kingdom Rush 6: Genesis
- Release Date
- September 24, 2026
- Developer(s)
- Ironhide Game Studio
- Publisher(s)
- Ironhide Game Studio